Rockarmor Steel Dual Wheel Carrier To Suit Toyota Landcruiser Fj100
Rockarmor Steel Dual Wheel Carrier To Suit Toyota Landcruiser Fj100
Couldn't load pickup availability
OEM Fitment
OEM Fitment
Fits just like its from the factory !
12 Month Warranty
12 Month Warranty
12 Month Warranty as Standard issue when fitted by qualified mechanic on all parts.
Customer Proven
Customer Proven
Any product with this popup added has been tested by one of our clients and is proven to be an amazing product !
FITTING MANUAL AT THE BOTTOM OF THE PAGE
ROCKARMOR GEN III REAR BAR To suit Toyota Landcruiser 100 Series (IFS) & Lexus 470
WHATS INCLUDED IN THE PACK:
Features:
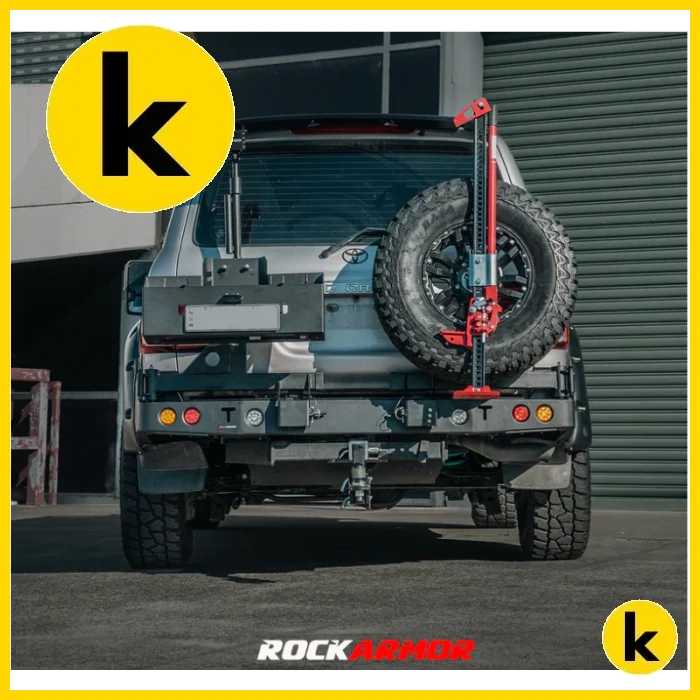
The Rockarmor Gen III dual spare wheel carrier has been designed and tested right here in Australia. It’s built specifically for serious 4WD tourers who want the best in rear protection and versatile spare wheel storage. With this system, you can securely carry two full-sized spare wheels, which is a massive advantage if you're heading into remote areas where roadside assistance isn’t always an option. Plus, the robust construction helps shield your rear of the vehicle from rocks, debris, and rough terrain—great for those long overland trips.
Most 4WD owners typically mount their spare tire either on the rear door or underneath the vehicle. While these options might seem convenient initially, they often cause issues down the track. Spare wheels on the rear door can put extra strain on hinges and might lead to damage over time — especially with the constant vibrations experienced during off-road drives. Underneath the vehicle, the spare can reduce departure clearance, making it tricky to navigate tight trails or steep inclines, increasing the risk of scraping or damage. The Rockarmor Gen III rear bar with its dual wheel carrier offers a smarter solution—protecting your vehicle, improving clearance, and giving you quick access to your spares when you need them most.
- FREE SHIPPING NOW !
Freight on Bullbars is not free and charged case by case, enquire for more info !
View full details